6 Steps To Affordable Perimeter Security And Lighting
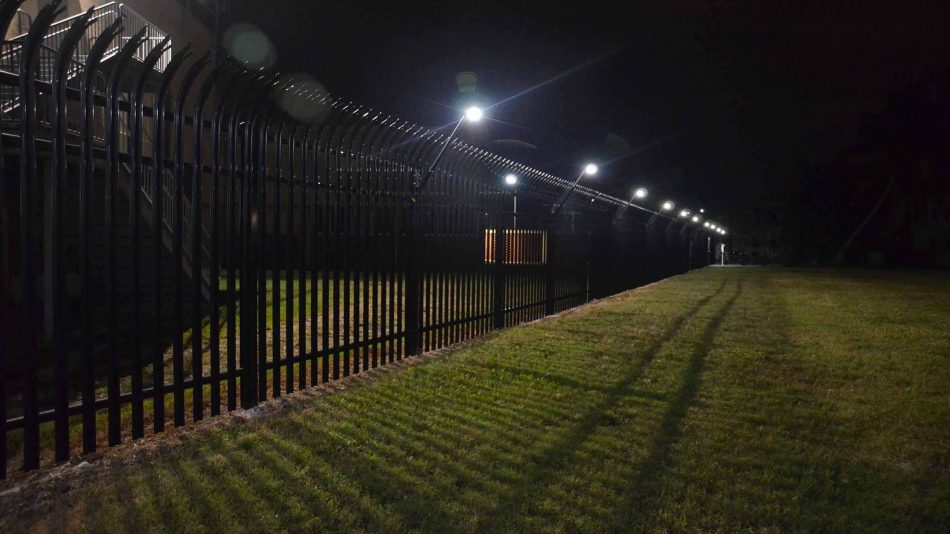
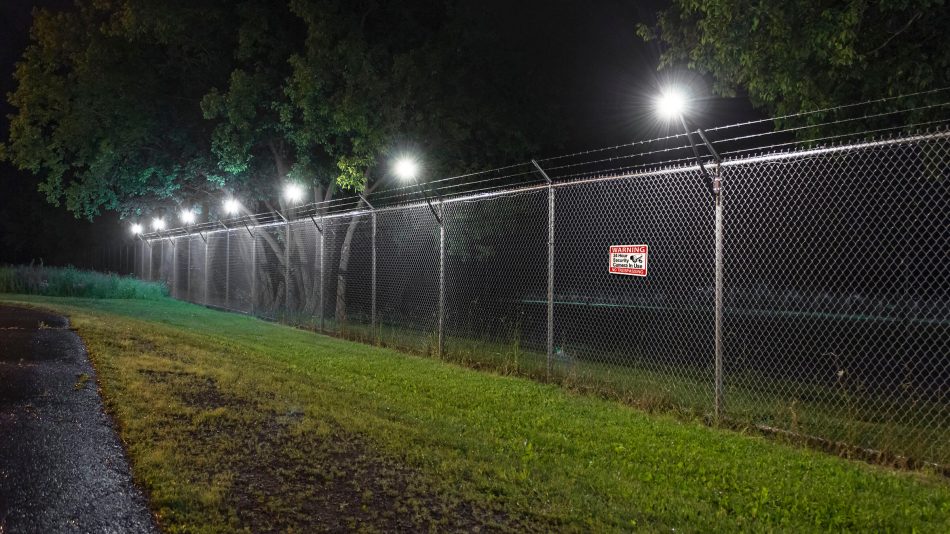
The Senstar LM100 is an affordable, easy-to-install system that enhances a security fence by turning it into a well-lit smart fence. A 2-in1 system, the Senstar LM100 detects, locates and illuminates any attempt to cut, climb or otherwise break through a fence.
This article explains the 6 basic steps required to protect a site:
Step 1: Collect basic site requirements
The first step is to survey the site and answer some basic questions related the site and requirements of your site. A great way to do this is to use an Internet-based mapping tool like Google Earth. It’s free and enables you to accurately measure perimeter distances.
Key information includes: The distance and height of the fence The number and type of gates Integrated security devices (cameras, gate contacts, sirens, etc) Type and configuration of the alarm system
Step 2: Identify security issues and risks
Next, walk along your perimeter and identify potential security risks.
Make sure that the fence is in good condition and free from any loose, cut, or unsecured fabric. Also, check for any loose signage or vegetation that may move during high-winds and trigger nuisance alarms. Finally, identify any outdoor equipment or cabling along the perimeter that may be susceptible to vandalism or tampering.
Step 3: Determine your equipment requirements
A Senstar LM100 system consists of the following equipment:
Luminaires: Typically installed at the top of every other fence post, 3 to 6 m (10 to 20 ft) apart Luminaire AP: One AP is required per Gateway. Gateways: Each Gateway supports up to 100 luminaires and four Wireless Gate Sensors. Gate protection: Luminaires can be installed directly on or near swinging gates. The Wireless Gate Sensor protects any type of gate. Powered by a D battery and/or embedded solar panel, it attaches directly to the gate. Power: The luminaires and gateway require 12 to 48V DC power (2.5W per luminaire, 1.0W per gateway) (UPS recommended).
Step 4: Install Senstar LM100 equipment
Installation requires one person. Most perimeters can be done in a day.
- Install the Gateway on or near the fence.
- Install the Luminaire AP at the top of the fence near the Gateway.
- Attach the luminaires to the fence along the perimeter.
- Run 2-wire low-voltage cable along the fence to power each luminaire.
Step 5: Configure and test for optimal performance
To configure the system, simply attach a laptop computer to the Gateway with a standard USB cable and run the included software. You can:
Group luminaries into separate detection zones Optimize sensitivity and detection parameters Manage lighting schedules, intensity level, and behavior upon intrusion detection Configure Gateway I/O ports to monitor other security devices
Step 6: Configure alarm outputs
The Gateway’s built-in programmable I/O ports can be connected directly to the general-purpose inputs found on most alarm systems. The function of each I/O port is software‑configurable, including zone, supervision, tamper, and equipment issue alarms.
For a more detailed PDF version of this information, including a sample site survey, click here.